How to deploy a Laravel app to Heroku in 10 steps
You’ve made it! You successfully created your shopify app. Now it’s time to deploy it! I want to write a step by step guide about laravel app deployment. We will deploy an app to heroku which is completely free.
there are some prerequisits for you to follow along:
- You have created a free heroku account on Heroku | Sign up
- You have installed the heroku CLI: The Heroku CLI | Heroku Dev Center
- You have created a laravel app
- You already have a git repo initialized within your app
If you have all that set up, then let’s go!
If you don't feel like reading, you can watch all the steps in my video right here:
1. Create a Procfile
Cd into your project root and create a Procfile by typing: touch Procfile
After creating the Procfile add the following lines
The Procfile is a configuration file for Heroku. It helps to specify the commands that are executed by the app on startup.
For example, you can put your app’s web server or worker processes, etc.
For example in my video on how to create scripttags (How to create Scripttags - Shopify App Development for #PHP Developers | L4Webdesign ), I showed you that you need to type php artisan queue:listen to create the scripttags upon installation.
If you take a look at the Procfile, you can see that we are referencing a nginx_app.conf file. We also have to create that and set it up
2. Setting up nginx config file
type touch nginx_app.conf to create the config file. Then paste in these settings:
3. Login to Heroku
To log into Heroku, type heroku login. Your browser will open and you will be redirected to a login page where you can enter your credentials. If everything worked then you’re logged in and you can now use the heroku CLI.
4. Create heroku application
Let’s switch back to our terminal so we can use the heroku-cli. As a side note: we are still at the root of our project.
type heroku create name-of-app. If you don’t put a name for the app, Heroku will create a random name and URL for it.
It should look something like this:

Now if you go to your dashboard on heroku you can see that your app was created succesully.

If you type in git remote -v then you will see, that heroku has already created a git repo for you.

Now any time you will push to that repo, heroku will trigger a new deployment.
In this guide we will push to herokus repo directly, but it is also possibe to connect your github account with heroku. That way you can always push to your github repo and it will trigger a deployment as well.
5. Push your code to Heroku
Push your code from the command line just like you would push it to github, but instead of the remote origin, push your changes to the remote heroku branch:
notice the flag --allow-empty This might come in handy at some time, when you want to trigger a deployment, but you haven’t made any changes to your code.
6. Checkout and debug deployed app
Your app should be deployed now, so let’s check it out! go to https://l4-shopify-app.herokuapp.com/ and take a look!
You should now see something like this:

This is good and bad at the same time. It’s good because the deployment worked but it’s bad because the app is not running yet. In order to see what causes our error, we can add APP_DEBUG=true to our .env file.
Important: when you copy all of your .env files, make sure that you update your APP_URL. Also make sure that you enter the correct values for SHOPIFY_API_KEY and SHOPIFY_API_SECRET. Otherwise the hmac will not be calculated correctly and you will see an error.
There are two ways to set up your .env file. Either on your heroku dashboard, or right on your CLI:
- Edit .env on heroku Dashboard:
From your dashboard, navigate to Settings and click Reveal Config Vars.
Now you can set up all your environment variables.

- Edit .env on CLI
If you prefer the CLI you can use the commandheroku config:add ENV_CONFIG=valueSo in this example I could have typed inheroku config:add APP_DEBUG=true
This will give you the same results.
If you want to add a little vim magic, you could add the commandheroku config:addto the beginning of every line (checkout How to insert text at beginning of a multi-line selection in vi/Vim ) and you would have a script to add all of your environment variables.
7. Create Database
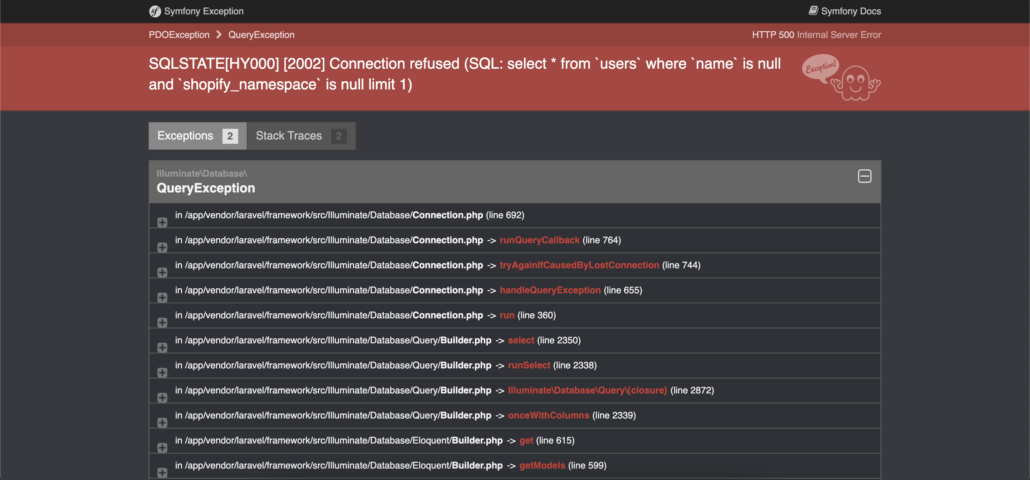
If we refresh our app on heroku we will see the following error page:

It says that the connection was refused. That happened because we haven’t set up a database yet. So let’s do this right now.
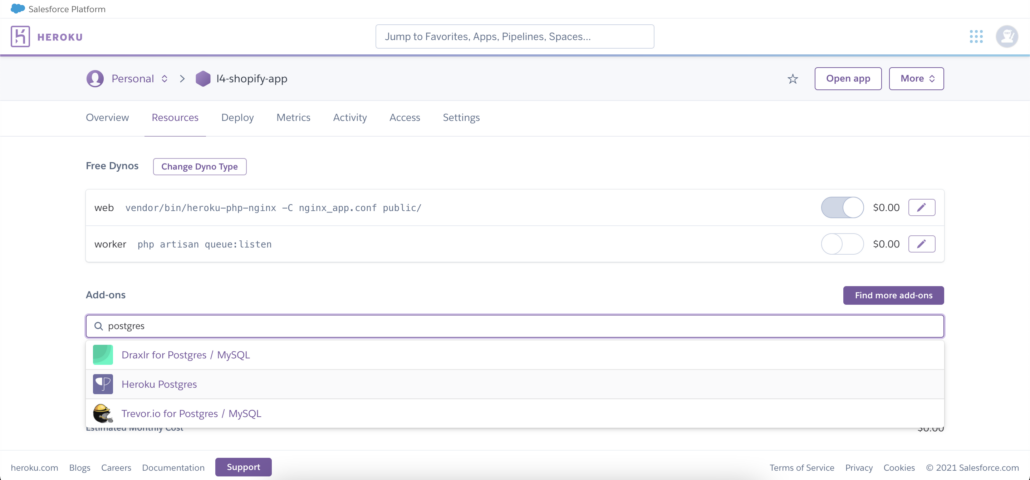
If you go to Resources you can search for resources for your app. Here you can search for your database. You can chose any database you want, like MySQL, MariaDB, MongoDB. I would recommend to use Heroku Postgres since they provide best offer. Here you can use up to 1GB of storage which I haven’t seen on any of the other databases.

Add this add-on and you will see, that postgres is now attached as your database.

8. Database credentials
In order to set up our database we need setup our database credentials. We will get all of the required properties by typing heroku pg:credentials:url in the command line.

We can now copy and paste all of the credentials to our environment variables. Remember how we did it in step 6a) or 6b) ?
Remember to add DB_CONNECTION=pgsql to your environment variables, since this was not on the output of our terminal.
9. Migrate and seed database
Now it’s time to migrate our database. If you have created a billable app (checkout this video I made: How to set up billing for Shopify apps (as a Laravel developer)) then you will need a database seeder to set up your billing table.
You now have two options to create your migration:
- run
heroku run php artisan migrate --seed - run
heroku run bash -a app-name
Now you have access to the bash of your app. from there you can now runphp artisan migrate --seedas well.
10. Create a public app at shopify dashboard
Set up a public app in shopify. If you don’t know how that is done, then you can watch my video here or read my article.
Don't forget to setup all of the environment variables in your heroku app.
11. You’re done 🎉
Congrats! You deployed your app to heroku!
You should now see your embedded shopify app if you install your app in a development store


